I’ve seen too many homeowners spend thousands on their backyard only to end up with something that doesn’t match what they imagined.
You probably have a vision for your outdoor space. Maybe you’ve been collecting ideas on Pinterest or driving through neighborhoods looking at what others have done. But turning that vision into reality? That’s where most people get stuck.
Here’s the truth: backyard landscaping isn’t complicated when you have a clear process to follow.
I’m going to walk you through the exact framework we use to transform backyards from concept to completion. This is the same approach that’s helped hundreds of homeowners avoid expensive mistakes and actually get the outdoor space they want.
The appcgarden backyard guide by activepropertycare covers everything from your initial planning to the finishing details that make your space feel complete.
You’ll learn how to map out your project, make smart design choices, and execute each phase without wasting money on things that don’t work.
No guesswork. No trial and error on your dime.
Just a proven system that takes you from where you are now to a backyard you’ll actually want to spend time in.
Step 1: The Vision and Planning Phase
You can’t just start digging holes and hope it works out.
I learned this the hard way when I watched my neighbor rip out half his yard only to realize he’d created a mud pit that flooded every time it rained.
The planning phase isn’t sexy. But it saves you from expensive mistakes.
Define Your ‘Why’
Start here. How do you actually want to use this space?
Are you hosting weekend barbecues? Do you need a quiet corner to read? Maybe your kids need room to run around without destroying your flower beds.
Your answer shapes everything else. A party space needs different features than a meditation garden.
Assess Your Canvas
Walk your yard at different times of day. Notice where the sun hits and where shadows fall.
Check your soil. Is it clay that holds water or sandy soil that drains too fast? Look at how water moves when it rains. Does it pool in certain spots?
The appcgarden backyard guide by activepropertycare walks through these assessments in detail, but the basic idea is simple. Work with what you have, not against it.
Create a Budget
Be honest about what you can spend.
I always tell people to add 10-15% on top of their initial number. Something always comes up. A tree root you didn’t expect. Extra soil because your calculations were off.
(Trust me on this one.)
Sketch a Layout
You don’t need fancy software. Grab some paper and draw circles for different zones.
Patio here. Garden beds there. Pathways connecting them.
Think about flow. How will you move from your back door to the fire pit? Where does it make sense to put seating?
Some folks worry they need to know exactly what are the benefits a private well appcgarden brings to their property before planning. But you can figure out water sources after you nail down the basic layout.
Function beats aesthetics every time.
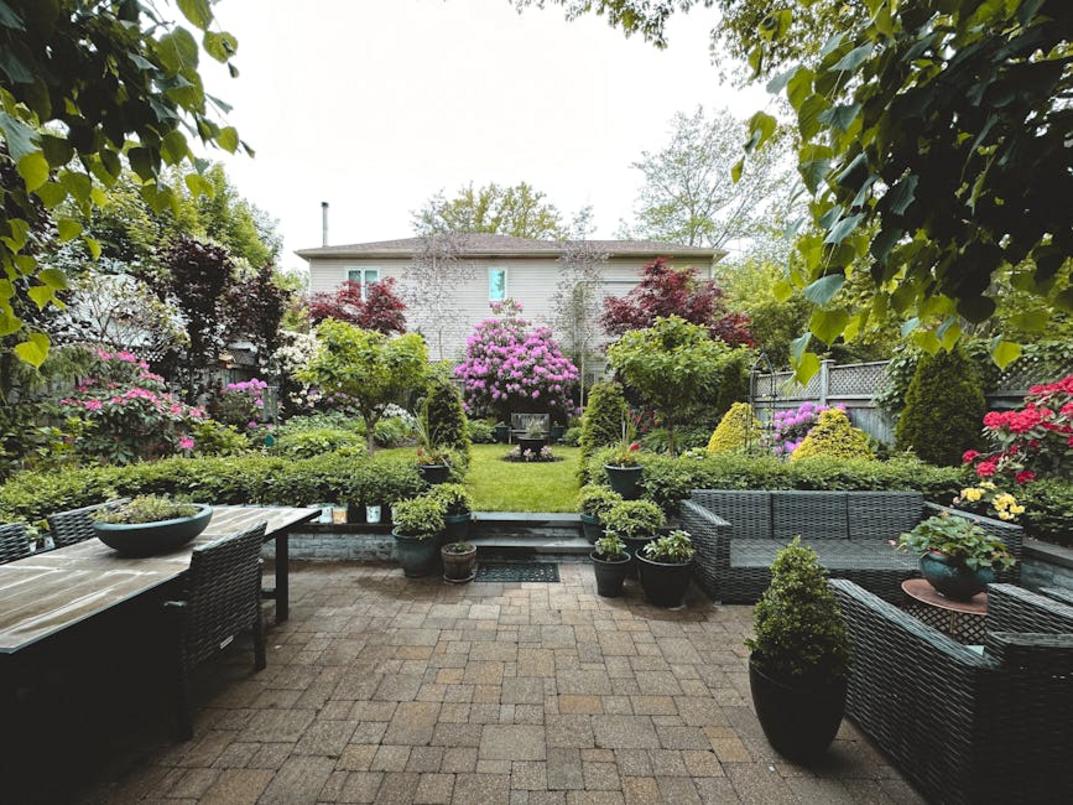
Step 2: Building the Foundation with Hardscaping
Think of hardscaping as the bones of your outdoor space.
These are the permanent structures that don’t grow or change with the seasons. Patios, walkways, retaining walls, decks, and water features. The stuff that stays put.
And here’s what most people get wrong.
They start planting first. They get excited about flowers and shrubs and jump straight to the fun part. Then they realize they need a walkway or a patio and have to dig everything up.
I’ve seen it happen more times than I can count.
Why Hardscaping Comes First
You need to install hardscaping before anything else goes in the ground. It’s not just a suggestion.
Heavy machinery tears up soil. Materials need to be hauled in. Excavation changes your grade. If you’ve already planted your garden beds, you’re going to destroy half of them getting a skid steer to your backyard.
The appcgarden backyard guide by activepropertycare walks through this sequence in detail. But the basic rule is simple: hard stuff first, soft stuff second.
Picking Your Materials
You’ve got options here. Each one has tradeoffs.
Pavers are popular because they’re easy to replace if one cracks. They come in different colors and patterns. But they can shift over time if the base isn’t right.
Natural stone looks great and lasts forever. It also costs more and requires skilled installation. You can’t just throw flagstone down and hope it works.
Concrete is affordable and durable. Some people think it looks boring (and honestly, plain gray concrete kind of does). But stamped or stained concrete can look surprisingly good.
Whatever you pick, make sure it matches your home. A modern house with clean lines doesn’t need rustic fieldstone everywhere. A cottage-style home probably shouldn’t have sleek concrete pavers.
The Part Nobody Talks About
Base preparation matters more than the material you choose.
I know that sounds boring. But if your base isn’t compacted right, your patio will sink. If drainage isn’t planned, water pools and freezes and cracks everything apart.
You want at least four to six inches of compacted gravel base under most hardscaping. More for driveways or areas with heavy use.
And slope everything away from your house. Even a quarter inch per foot makes a difference. Water needs somewhere to go that isn’t your foundation.
(This is where a lot of DIY projects fall apart. The materials look great for a year, then everything shifts.)
Get the foundation right now and you won’t be tearing it all out in three years.
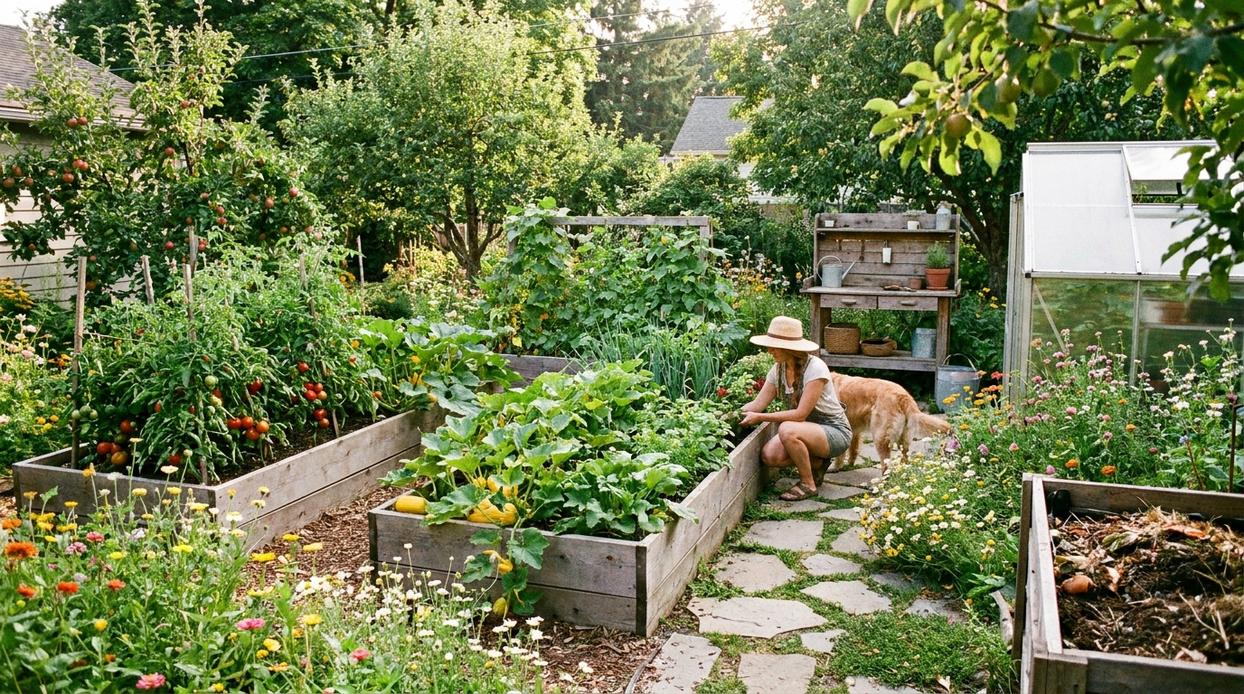
Step 3: Bringing Your Yard to Life with Softscaping
Let me clear something up right away.
When people talk about landscaping, they usually mean two things. Hardscaping is your patios and walkways. Softscaping is everything that grows.
Trees. Shrubs. Flowers. Grass. The living stuff.
And here’s what most homeowners get wrong. They pick plants because they look pretty at the garden center. Then wonder why everything dies by August.
I’ve seen it happen dozens of times.
The secret? It’s called right plant, right place. Sounds simple because it is.
You need to match your plants to your actual conditions. That means checking your climate zone first. Then looking at your soil type. Finally, figuring out which spots get full sun and which stay shaded most of the day.
A shade-loving hosta will fry in direct sunlight. A sun-loving rose will struggle in the shade. No amount of watering fixes a bad match.
Building Visual Interest
Once you know what can survive in your yard, you can start thinking about how it all looks together.
I recommend working in three layers:
- Tall anchor trees in the background
- Mid-level shrubs to fill the middle ground
- Low-lying groundcover or perennials up front
Mix your colors and textures too. Pair broad-leafed plants with fine, feathery ones. Combine different shades of green. Throw in some seasonal color where it makes sense.
The appcgarden backyard guide by activepropertycare breaks this down room by room if you need more specific help.
Get Your Soil Right First
Here’s something nobody wants to hear but everyone needs to know.
Your soil matters more than your plant selection.
Healthy soil grows healthy plants. Poor soil? You’ll be replacing dead shrubs every spring.
Before you plant anything, work compost into your beds. Add organic matter. Get a soil test if you’re serious about this (most extension offices do them cheap).
Good soil holds moisture without getting waterlogged. It gives roots room to spread. It feeds your plants naturally.
Mulch does three things you’ll appreciate later. It keeps moisture in the ground during dry spells. It stops weeds from taking over. And it keeps soil temperatures more stable when the weather swings.
Apply two to three inches around your plants. Keep it away from stems and trunks though. You want to protect roots, not rot them.
Step 4: Adding Ambiance with Lighting and Final Touches
Here’s where most people stop too early.
They get the plants in. Maybe add some mulch. Then they call it done.
But the difference between a nice yard and one that actually makes you want to be outside? It’s all in these final touches.
I’m talking about lighting first.
Not because it’s trendy. Because it WORKS. You put in good landscape lighting and suddenly your space doesn’t shut down at sunset. You can actually use your patio after dinner. Walk your dog without tripping over the garden edge.
Path lights along walkways keep things safe. Uplighting on trees? That’s pure atmosphere. And ambient lighting around your patio area turns an ordinary evening into something worth staying outside for.
I always tell people to go with low-voltage LED lighting. It uses less power. Lasts longer. And you won’t need an electrician for most installations (which saves you real money).
Now for the stuff that makes it yours.
Outdoor furniture that fits how you actually live. Planters where you want pops of color. Maybe a fire pit if you’re into that. Some folks add a small water feature.
The appcgarden backyard guide by activepropertycare covers these finishing elements in detail. But the point is simple.
These aren’t just decorations. They’re what turn your designed space into a place you’ll actually use.
Pick what reflects you. Not what some magazine says you should have.
From Blank Canvas to Backyard Oasis
You now have the same framework we use at Active Property Care for every project.
This isn’t guesswork. It’s a proven process that takes you from concept to completion without the headaches.
I’ve seen too many homeowners skip the planning phase and jump straight to picking out plants and furniture. They end up with mismatched elements that don’t work together. Or worse, they realize their drainage is terrible after they’ve already installed everything.
That’s expensive and frustrating.
This approach works because it flips the script. We start with function and foundation before we ever talk about aesthetics. That’s how you get a backyard that looks great and actually lasts.
You came here to learn how to plan your backyard project the right way. Now you have that roadmap.
Here’s what to do next: Take the appcgarden backyard guide by activepropertycare and map out your space using the steps we covered. Start with your functional needs and work forward from there.
Ready to turn your vision into reality? Contact Active Property Care today for a consultation. We’ll help you build the backyard you’ve always wanted without the trial and error.
 Radek Sowaak